BlinkThorLabs
Building an AUTOSAR BSW Stack From Scratch: A Beginner's Roadmap
Six milestones, realistic time estimates, and the mistakes everyone makes at each one.
If you've just been handed an AUTOSAR project and your only prior embedded experience is bare-metal C, the first week can feel like being dropped into a city with no map — everyone around you says "RTE" and "BSW" and "MCAL" like these are obviously distinct things, and you're quietly trying to figure out which one you're even supposed to be looking at.
This is the map. Six milestones, in the order that actually makes sense to learn them, with honest time estimates (not the "this should take an afternoon" kind of estimate that assumes you already know what you're doing), the mistakes almost everyone makes at each stage, and where to go next. None of it assumes you've touched AUTOSAR before.
Milestone 1: Understanding the Layered Architecture (Realistic time: 1-2 days, just reading and diagramming)
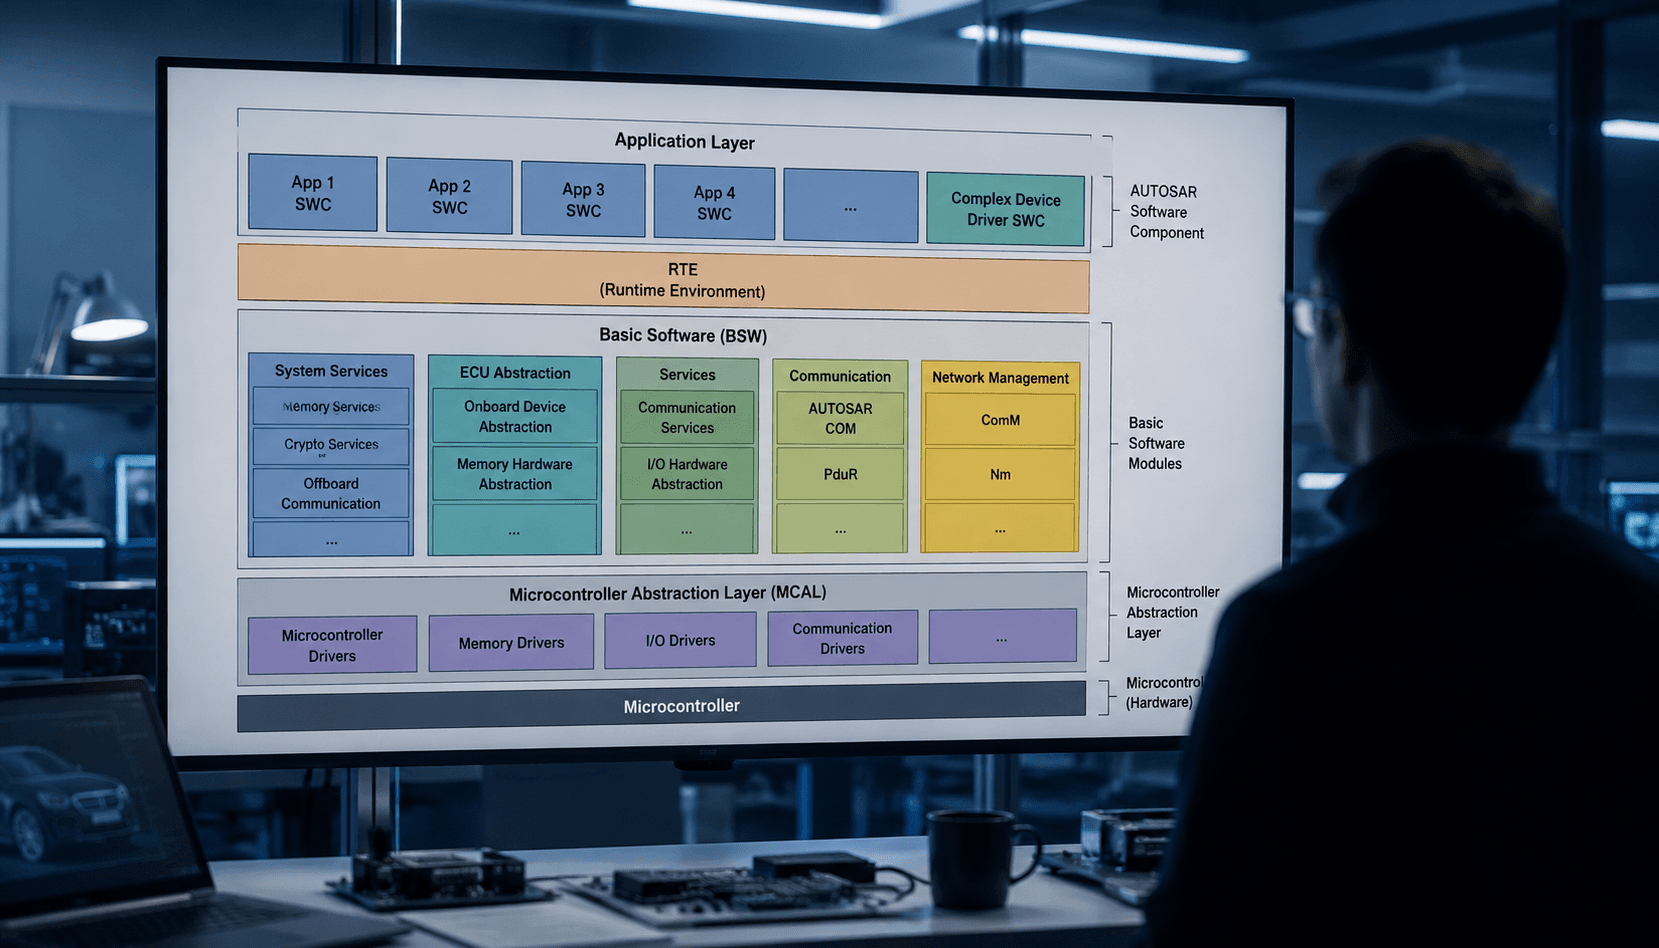
Before installing anything, spend real time understanding why AUTOSAR is shaped the way it is. The layering exists to separate application logic from hardware specifics, so the same application software component (SWC) can theoretically run on different microcontrollers without rewriting it.
The stack, top to bottom:
- Application Layer — your actual feature logic, written as Software Components (SWCs)
- RTE (Runtime Environment) — the generated glue code that connects SWCs to each other and to Basic Software, so your application code never calls hardware directly
- BSW (Basic Software) — communication stacks (CAN, LIN), memory services, diagnostic services, OS
- MCAL (Microcontroller Abstraction Layer) — the layer that actually touches registers
Common mistake at this stage: trying to jump straight into tooling before this sinks in. If you don't understand why RTE exists as a generated intermediary, every error message you see for the next month will feel arbitrary instead of logical. Draw the layers yourself, by hand, until you can explain to someone else why an SWC can't just call a CAN driver function directly.
Resource to go next: Vector's free AUTOSAR fundamentals training videos, or the AUTOSAR Classic Platform Specification's own "Layered Software Architecture" document — dense, but it's the primary source everyone else is paraphrasing.
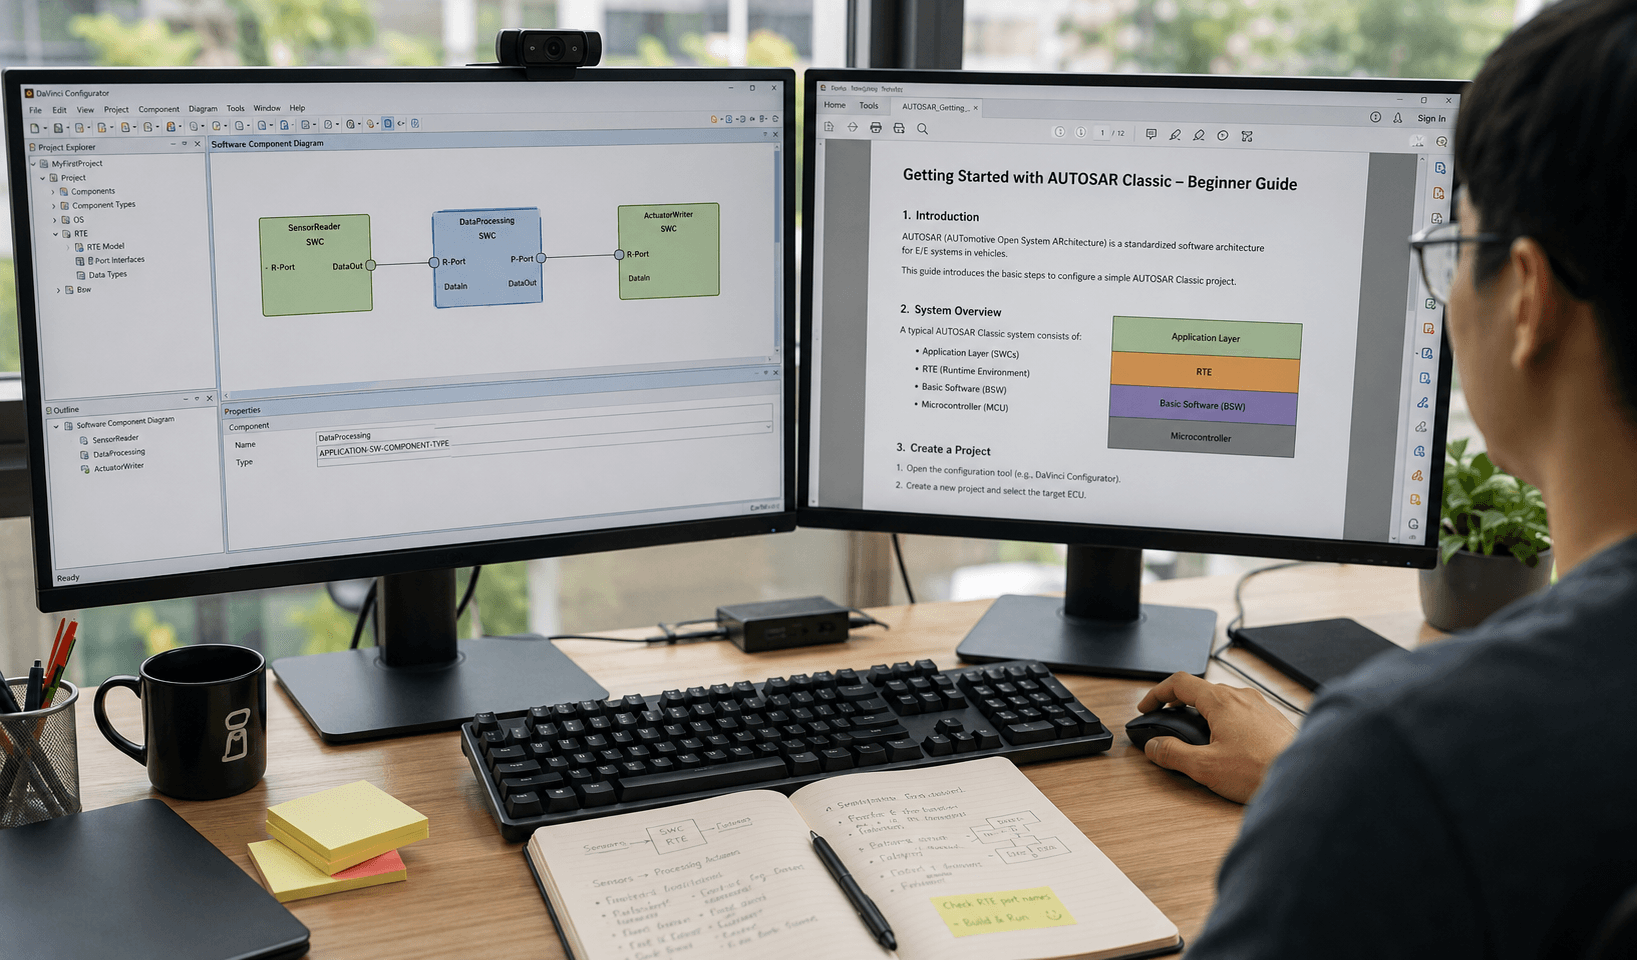
Milestone 2: Installing Your Tooling (Realistic time: half a day to a full day, mostly waiting and troubleshooting licenses)
You need a configuration tool — this is non-negotiable in AUTOSAR Classic, since almost nothing is written by hand. The two most common in industry are Vector DaVinci Configurator and EB tresos Studio; either has a demo/evaluation mode sufficient for learning.
Install one of them (DaVinci if your company already uses Vector tools elsewhere; EB tresos if you have access to it, since the free trial tends to be more permissive for the MCAL configuration). Budget real time for this — evaluation licenses can be finicky, and Java-based tooling (both of these use Eclipse-based UIs) sometimes needs a specific JDK version that isn't your system default.
Common mistake at this stage: trying to install the full toolchain (including a target compiler like GHS or IAR) on day one. Get the configurator running and displaying an empty project first. Add the compiler toolchain once you actually need to build something in Milestone 5 — bundling too many installs together makes troubleshooting each one harder.
Resource to go next: your tool vendor's own "getting started" project template — both Vector and EB ship example projects specifically designed for this stage.
Milestone 3: Configuring Basic MCAL (Realistic time: 2-3 days)
This is where AUTOSAR stops being abstract. MCAL configuration is where you tell the tool which pins do what, which clock speeds you're running, and which peripherals (GPIO, ADC, PWM) are active. Start with the absolute minimum: configure a single GPIO output pin (an LED, if you have real hardware already) and generate the MCAL code.
Common mistake at this stage: configuring too much at once. New engineers often try to set up CAN, ADC, and PWM simultaneously in their first MCAL pass, then can't tell which configuration caused a generation error. Configure one peripheral, generate, confirm the generated code looks sane (open it — actually read the generated driver init function), and only then add the next peripheral.
Resource to go next: your MCU vendor's specific MCAL configuration guide (NXP and Infineon both publish detailed AUTOSAR MCAL user guides specific to their silicon) — generic AUTOSAR documentation won't tell you the specific register mappings your part needs.
Milestone 4: Writing Your First SWC (Realistic time: 1-2 days)
Now you write actual application logic — a Software Component with a simple runnable (a function that executes periodically or on an event) that does something trivial and observable, like toggling that same GPIO you configured in Milestone 3, but this time going through the RTE instead of calling MCAL directly.
This is the milestone where the layered architecture from Milestone 1 stops being a diagram and starts being something you feel in your hands: you'll write a runnable that calls an RTE API (like Rte_Write or a port-specific call) rather than touching the GPIO driver, and watching that abstraction actually work end-to-end is genuinely the moment AUTOSAR starts to click for most people.
Common mistake at this stage: forgetting to define the port interfaces correctly in the SWC description before writing the runnable, then being confused why the RTE generation step in Milestone 5 fails with a missing-connection error. The SWC's ports (Sender-Receiver or Client-Server) need to be defined and connected to something — even a stub — before the RTE generator has anything to work with.
Resource to go next: vendor example SWC templates — nearly every configurator ships a "Hello World" SWC project specifically for this milestone; use it as a reference rather than starting from a fully blank component.
Milestone 5: Generating the RTE (Realistic time: half a day, but expect at least one failed generation)
This is the step that ties Milestones 3 and 4 together: running RTE generation, which produces the glue code connecting your SWC's ports to the BSW modules and other SWCs. Expect your first generation attempt to fail. This is normal, not a sign you've done something unusually wrong — RTE generation is essentially a very literal-minded consistency checker across your entire configuration, and it will find every small mismatch.
Common mistake at this stage: panicking at the error message instead of reading it carefully. RTE generation errors are usually precise about what is missing (an unconnected port, a data type mismatch between two SWCs), even when the wording is dense. Read the first error in the log, not the last — later errors are often just consequences of the first one.
Resource to go next: keep a personal running list of RTE error messages you encounter and what actually fixed them. This sounds tedious, but it becomes the single most useful document you own for the next six months, because the same handful of error patterns recur constantly across projects.
Milestone 6: Building and Flashing Real Hardware (Realistic time: 1-2 days for your first successful flash, largely toolchain setup)
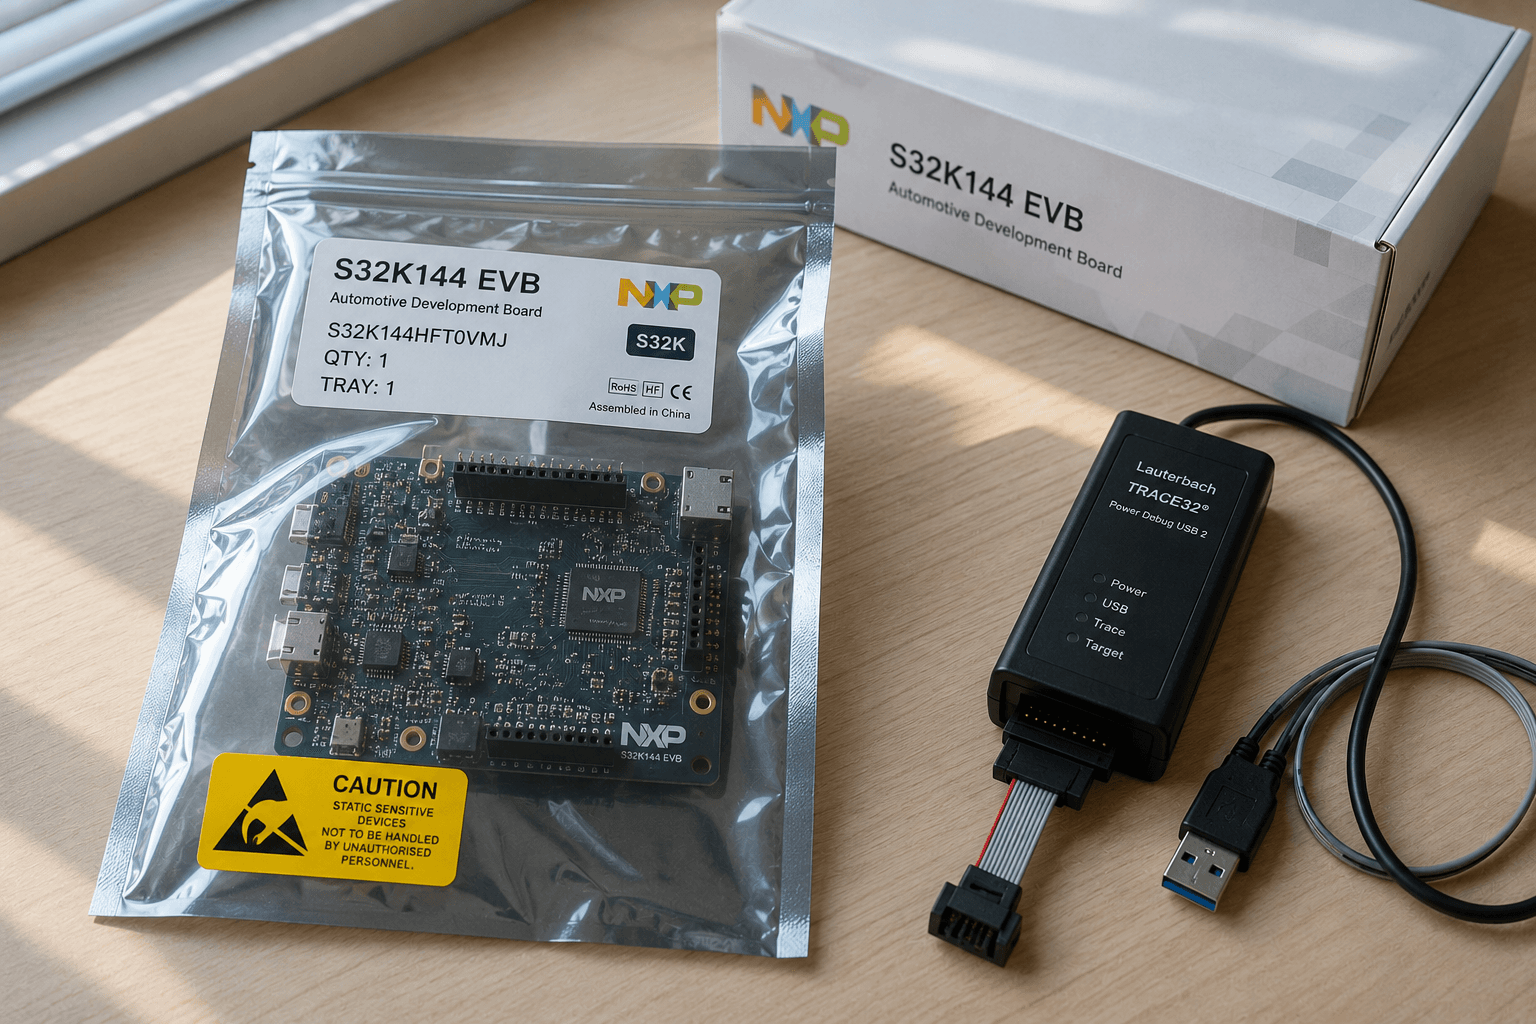
The final step: compile everything (RTE-generated code, your SWC, MCAL, BSW) using your target compiler, and flash it onto a real board — an NXP S32K144 or an Infineon AURIX TC-series eval board are both common and reasonably well-documented starting points.
This is where toolchain configuration (compiler include paths, linker scripts, memory maps) becomes real, and it's often the most frustrating milestone for a first-timer purely because the errors here are generic embedded/compiler errors rather than AUTOSAR-specific ones — meaning your AUTOSAR knowledge doesn't directly help you debug a linker script issue.
Common mistake at this stage: underestimating how much of this step is just standard embedded toolchain setup, unrelated to AUTOSAR itself, and getting discouraged thinking you've regressed. You haven't — this is genuinely a different skill (build systems, linker scripts, debugger configuration) layered on top of what you just learned.
Resource to go next: your specific eval board's getting-started guide from the silicon vendor, used purely for the toolchain/flashing steps, independent of AUTOSAR documentation.

Putting It Together
Realistically, working through all six milestones for the first time, part-time alongside other work, takes most people somewhere between two and four weeks — faster if you have a mentor to unblock you quickly when a generation error doesn't make sense, slower if you're doing it entirely solo from documentation.
The thing worth holding onto through all of it: every one of these milestones gets dramatically faster the second time. The first SWC you write might take a full day including all the confused re-reading of port configuration docs. Your fifth SWC will take twenty minutes. AUTOSAR has a genuinely steep initial learning curve and a surprisingly gentle one after that — the goal of this roadmap is just to get you through the steep part without giving up somewhere around Milestone 3, which is where most people I've mentored have been tempted to.